 by
by Installing a garage door opener is a valuable skill that can save you time and money while enhancing the convenience of your daily routine. The Linear Pro Access Garage Door Opener is known for its reliability and efficiency. This article will guide you through the step-by-step process of installing your Linear Pro Access Garage Door Opener, while providing insights, tips, and best practices to ensure a successful installation.
Understanding the Linear Pro Access Garage Door Opener

The Linear Pro Access series offers various models that cater to different needs, whether you’re looking for a standard opener or a more advanced unit with smart technology. Key features of the Linear Pro Access Garage Door Opener include:
- Powerful Motor: Most models come with a robust motor, providing reliable lifting power for various door sizes.
- User-Friendly Controls: The user interface is designed for ease of use, making it simple to operate.
- Safety Features: Built-in safety mechanisms prevent accidents, ensuring that the door stops if it encounters an obstruction.
- Smart Technology: Some models offer smartphone connectivity, allowing you to control your garage door remotely.
Preparation Before Installation

Before you begin the installation process, it’s crucial to gather the necessary tools and ensure you have a clear workspace. Here’s a checklist of what you’ll need:
- Drill with drill bits
- Screwdriver (flathead and Phillips)
- Wrench set
- Measuring tape
- Ladder
- Level
- Safety goggles
- Owner’s manual for the Linear Pro Access Garage Door Opener
Additionally, make sure to read through the owner’s manual before starting. Familiarizing yourself with the instructions will provide valuable insight into the specific components of your model.
Step-by-Step Installation Process
Step 1: Prepare the Garage Door
Begin by ensuring that your garage door is in optimal condition. Check for any damage or misalignment that could affect the opener’s performance. If necessary, make repairs to the door before proceeding.
Step 2: Install the Header Bracket

Locate the header bracket in your installation kit. This bracket will support the opener. Here’s how to install it:
- Measure and mark the center of the garage door.
- Position the header bracket above the door, aligning it with your mark.
- Use a level to ensure it is straight, then secure it with screws.
Step 3: Assemble the Opener
Next, assemble the garage door opener unit as per the instructions in the manual. Pay close attention to the wiring and the installation of the motor unit.
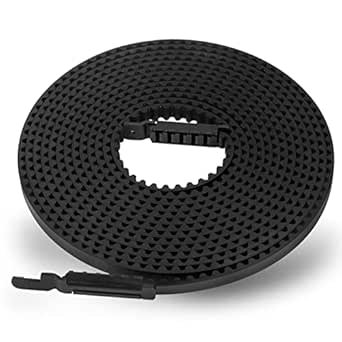
Step 4: Install the Rail System
The rail system is crucial for the functioning of the garage door opener. Follow these steps:
- Connect the rail pieces according to the manual.
- Attach the rail to the motor unit.
- Secure the other end of the rail to the header bracket.
Step 5: Attach the Mounting Bracket
Once the rail is installed, it’s time to attach the mounting bracket to the ceiling of your garage. This ensures that the opener remains stable during operation:
- Use a ladder to reach the ceiling.
- Position the mounting bracket above the garage door opener.
- Secure it using appropriate screws, ensuring it is level.
Step 6: Connect the Power Supply

Before connecting the power supply, ensure that the area is safe and free from water or moisture. Follow these instructions:
- Plug the opener into a nearby electrical outlet.
- If your model requires hardwiring, consult a qualified electrician for installation.
- Ensure that the opener is grounded to prevent electrical hazards.
Step 7: Install Safety Sensors
Most modern garage door openers come equipped with safety sensors that prevent the door from closing on objects or people. Install the sensors as follows:
- Mount the sensors on either side of the garage door, approximately six inches above the floor.
- Ensure they are aligned correctly so they can communicate with each other.
- Connect the wiring from the sensors to the opener unit.
Step 8: Program the Opener

Once everything is installed, it’s time to program your garage door opener. This process can vary by model, so consult your manual for specific steps. However, here are some common programming steps:
- Press the “Learn” button on the motor unit.
- Within 30 seconds, press the button on your remote control.
- Test the remote to ensure it operates correctly.
Testing and Final Adjustments
After installation, it’s essential to test the opener and make any necessary adjustments. Here’s how to do it:
- Open and close the door using both the remote and wall control.
- Check the door for smooth operation; if it hesitates or sticks, adjust the opener settings.
- Test the safety sensors by placing an object in the door’s path to ensure it reverses correctly.
Maintenance Tips for Longevity
To ensure your Linear Pro Access Garage Door Opener continues to function effectively, consider the following maintenance tips:
- Regularly inspect hardware for wear and tear.
- Lubricate moving parts every six months.
- Check the safety sensors and clean them to avoid interference.
- Test the opener monthly to ensure it works properly.
Installing your Linear Pro Access Garage Door Opener can be a straightforward process if you follow the outlined steps. By preparing adequately, understanding the components, and adhering to safety protocols, you can enjoy the convenience and security that comes with a properly functioning garage door opener. Remember to conduct regular maintenance to prolong its lifespan and ensure optimal performance. With the skills acquired through this installation process, you can tackle other home improvement projects with confidence.


